
Randy Tan has been raising koi for several years and as a seasoned koi owner he knew first hand the importance of clean and healthy pond water for his scaled friends. When his koi outgrew his current pond, he did what every koi lover would lover would do and built them a bigger and better home!
Randy came to Play it Koi in spring of 2020 seeking the very best of the best in pond filtration. He had the vision for a backyard oasis for his koi with the clearest pond water available. We set him up with the best of the best in pond filtration, including;
- A Gravity Fed Rotating Drum Filter (RDF)
- An AlphaOne 10.0 Bead Filter
- 2 X Large SeaSide Aquatics Bakki Showers
- 3 X Rhino II Aerated Bottom drains
Enjoy Randy's story of how the project went and his lessons learned along the way.
1. Before he started the demolition of his old pond, Randy needed to first build a temporary home for his koi fish. He used a SeasSide Aquatics portable show tank as their home for 4 weeks during the build. Find a place where you don't mind the grass getting yellow during your build.
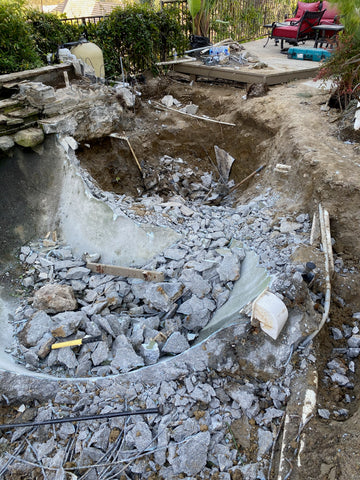
Once everyone was safe in their new home, the demolishment of the old pond began. Stone by stone the outdated look and function was reduced to rubble.
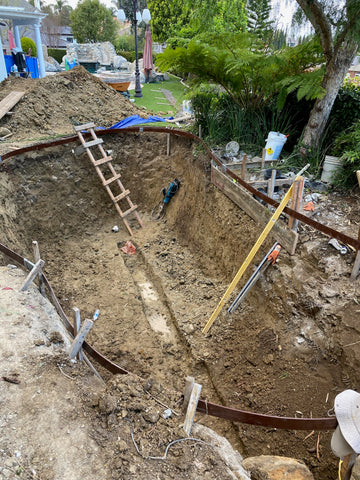
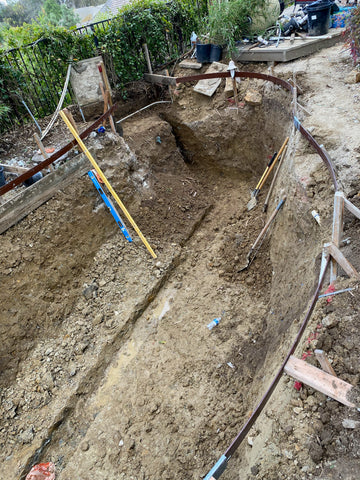
Within a week or two, Randy was already digging out the area where the gravity-fed rotating drum filter would sit. The filter removes gunk from the pond even before it reaches other biological filters. This workhorse is one of many that keeps your water clean and your fish healthy and happy.
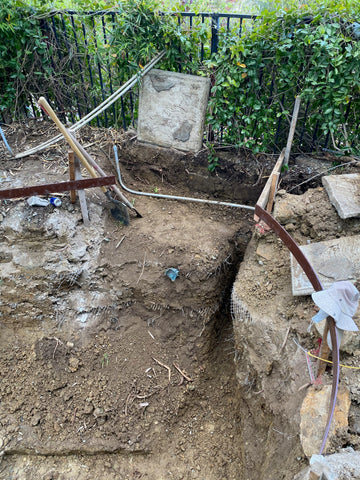
Next, Randy dug out a trench for three aerated bottom drains. Play It Koi's drains are durable. The ones that Randy chose can be installed either under or over the liner. If you don't want to renovate your existing pond by removing the liner, technically you could install these drains on top of your filter and then connect each to piping that pulls water into a filter at the bottom or sides of your pond. Randy chose to move filtration from above the liner to pipes under concrete. Aerated drains provide fish with extra bubbling oxygen in the winter as water starts icing.
Next, the pond was lined with rebar to hold concrete for a durable, lasting shape. Two skimmers were installed-- one at the upper right of the photo and the other at the bottom right of this photo on the opposite side of the falls. Skimmers remove larger debris such as leaves and needles that clog up and dirty ponds.
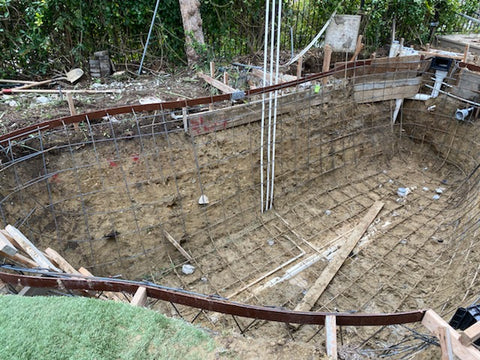
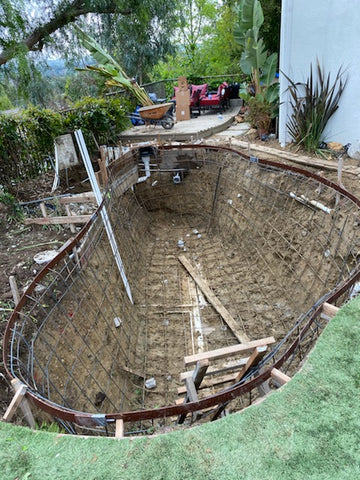
Notice that the pond is now over five feet deep so that Randy's koi can dive down and live in aerated water throughout the winter.
Not all ponds are made of concrete, but Randy's will last for years.

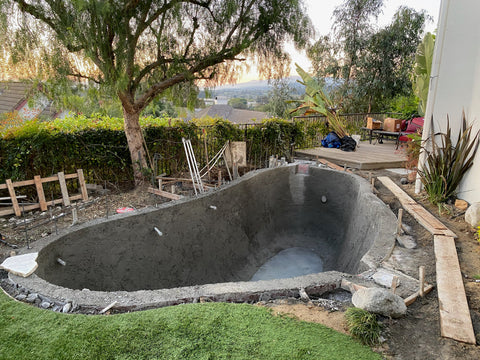
After his concrete set, filtration was connected throughout the pond. Randy's koi were released with a salt bath to ease them into their new environment (hence the foam).
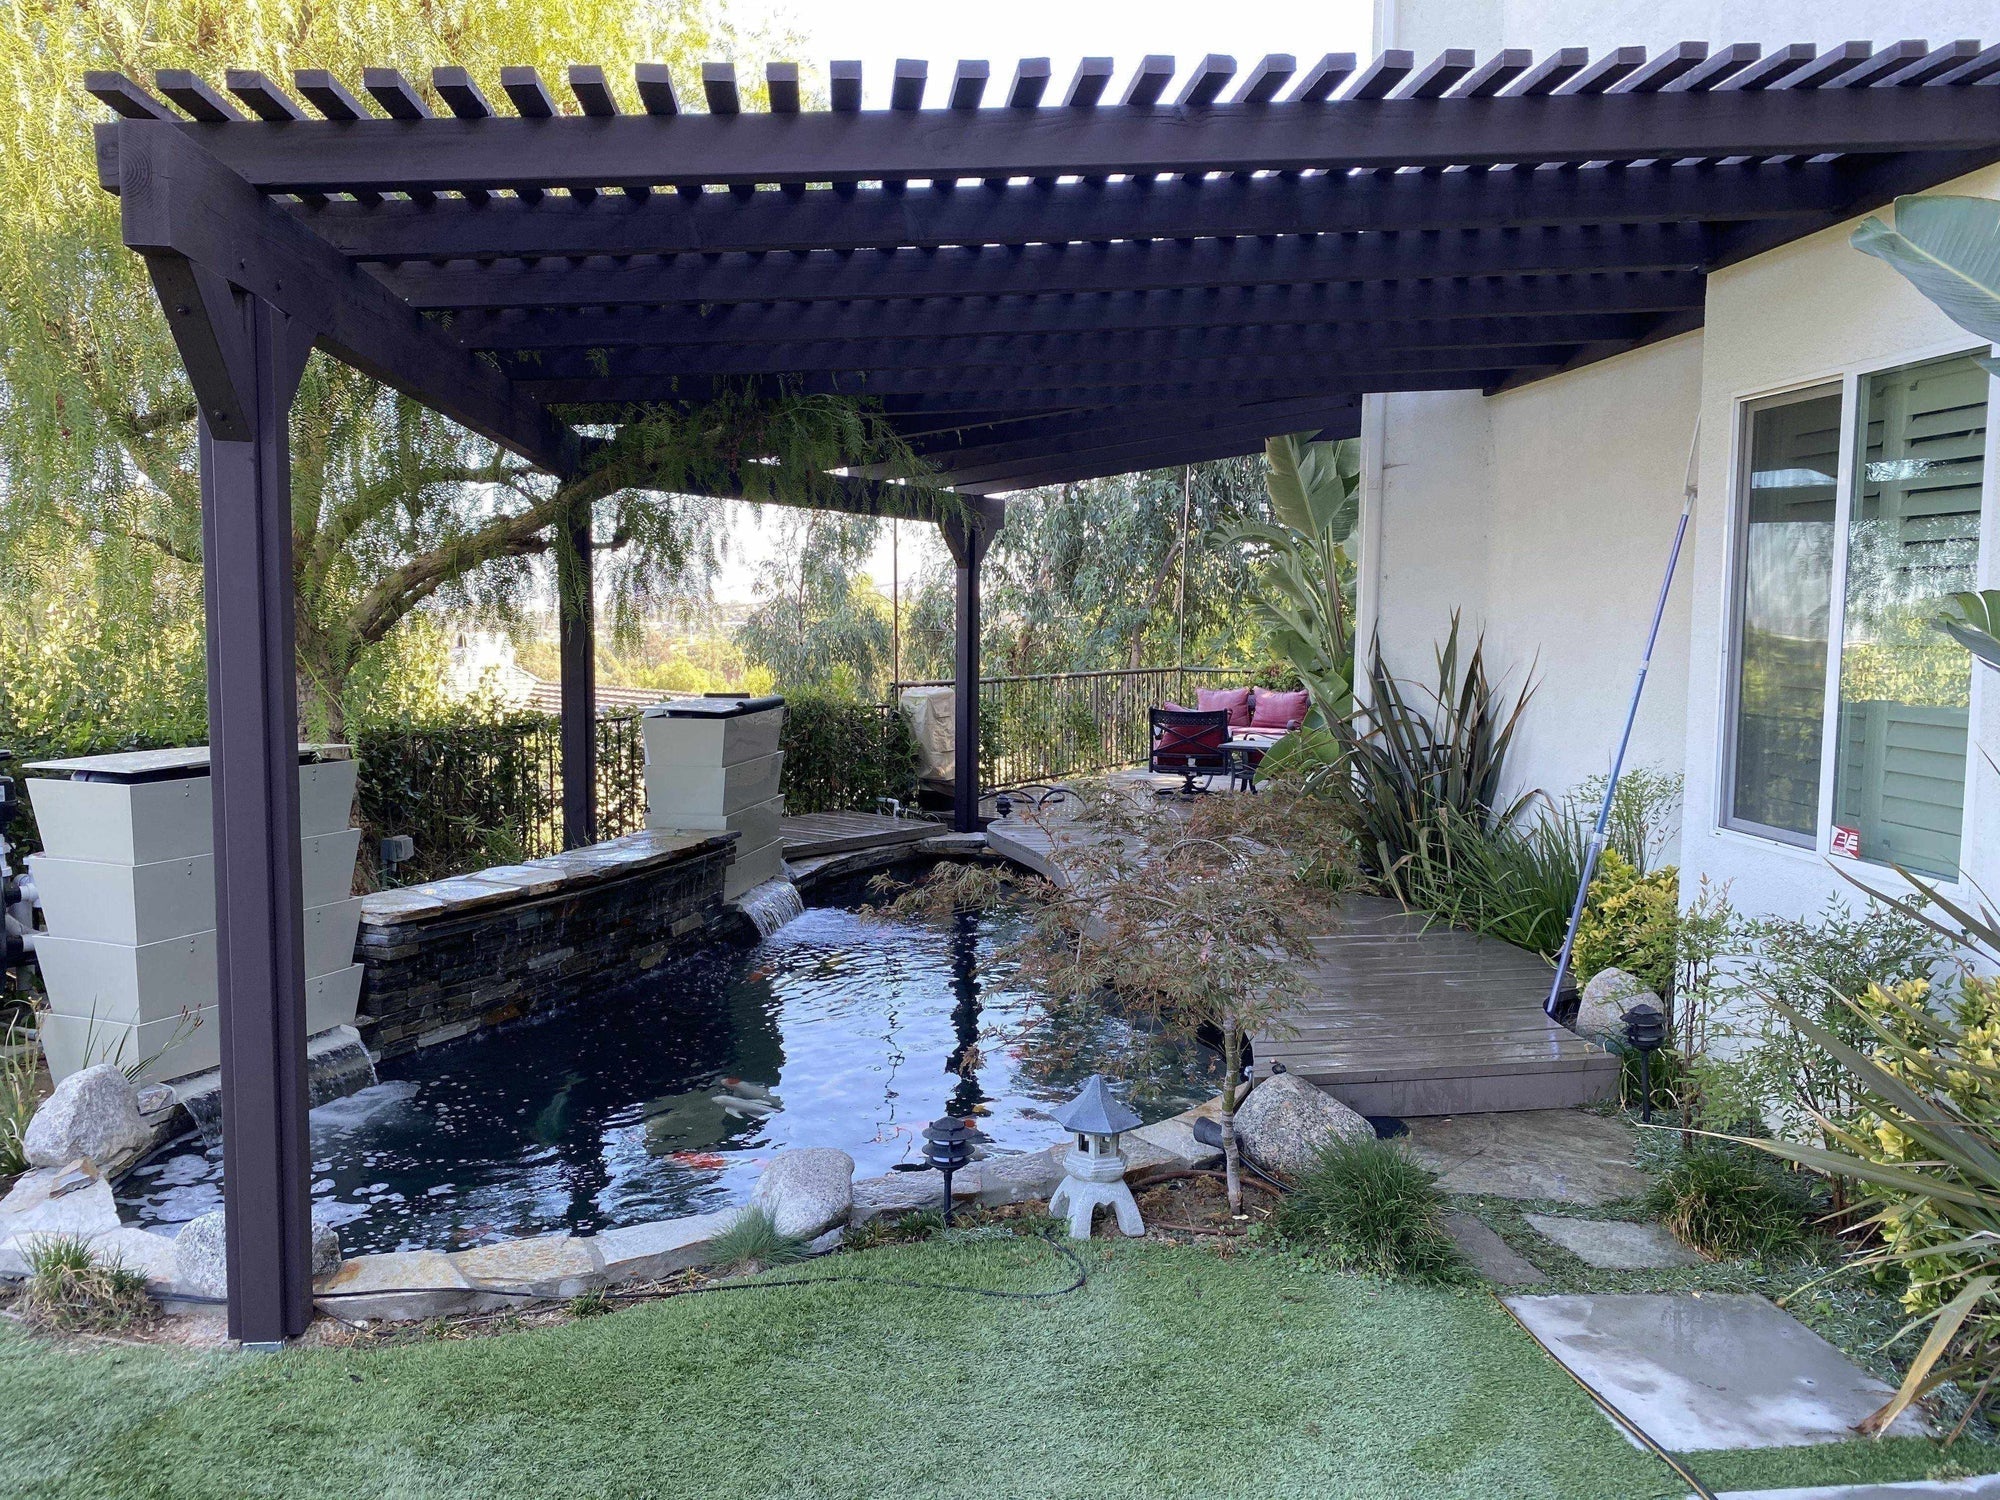
Finally, pond plants and landscaping evolved in and around the pond. He also Constructed a gazebo to protect his koi from Heron and other predator's while adding privacy.


Randy surveyed his work knowing that expense and effort paid off. He can now pull up a chair after a long day's work and sit by his new oasis to enjoy watching his koi peacefully swim around while he chills to the trickling of his pond's waterfall.
We really enjoyed working with you Randy! Thanks for sharing!
1 comment
Eloy Lopez
That’s a very nice koi pond..I can’t afford something that big ,but would love one that size..what size pump and filter would you recommend for a 1078 gallon pond with a three foot rise waterfall? Wish I could win some kind of raffle for a nice makeover on our pond..